Preparing eClaims
Before you send eClaims you are given the opportunity to check them for
accuracy. This may occur after you save an invoice (depending on your
configuration
) or it may occur when you click Send all unsent eClaims or
Send unsent eClaims captured by you on the eClaims menu.
Panacea will check the eClaims and might provide you with a list of errors
and/or warnings:
- Errors are indicated with the
 icon. Panacea will NOT allow you to send eClaims with errors.
- Warnings are indicated with the
 icon. Panacea will allow you to send eClaims with warnings, but you should try
to rectify the problems beforehand.
icon. Panacea will allow you to send eClaims with warnings, but you should try
to rectify the problems beforehand.
- Lines indicated with the
 icon will not be sent. The tariff code or NAPPI code on this line has been
disabled for eClaims.
icon will not be sent. The tariff code or NAPPI code on this line has been
disabled for eClaims.
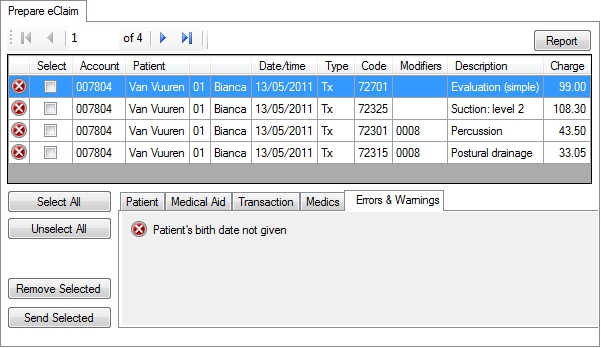
In the example below the patient's birth date was not captured. The
patient's birth date is a mandatory field, so Panacea will not allow you to send
the eClaim.
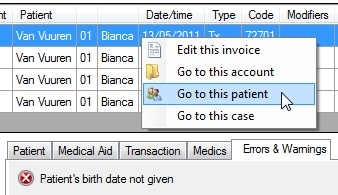
To make it easy to resolve problems identified by Panacea a direct path is provided to all items
associated with the eClaim. Simply right-click on the eClaim and a context
menu will be displayed which will take you to any of the relevant items.
To correct the patient's birth date (in the example) we need to go to the
patient's record
. Clicking Go to this patient will open the
patient's record
. You can then edit the patient's record and fill in the missing birth
date. When you return to the Prepare eClaims tab
the birth date error will have been removed.
In the same way, depending on what error or warning you wish to correct, you can
edit the relevant
invoice
,
account
or
case
.
|
Once all errors and warnings have been fixed the Prepare eClaims tab should look
like this:
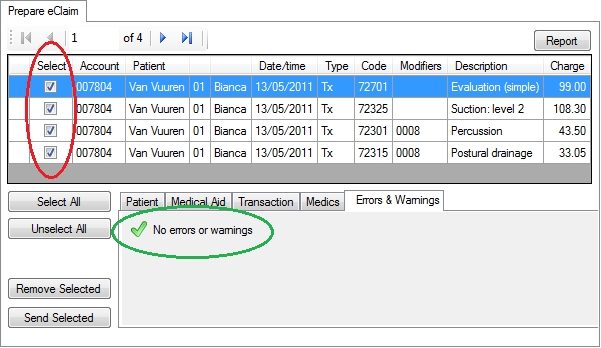
No errors or warnings should be displayed in the Errors &
Warnings tab. As mentioned you CAN send eClaims with warnings, but
make sure you understand the warnings and that you are prepared to ignore them.
Before sending the eClaims it is strongly recommended that you check the eClaims
for accuracy first. Once you are ready you need to select the eClaims you
want to send - as there may be more than one eClaim displayed. The second
column from the left (circled in red above) is the Select column.
Only items that have been checked (ticked) in this columns will be sent.
Note that you cannot select individual lines - you can only select whole
invoices.
Once you have selected the eClaims you want to send click Send Selected.
Panacea will send the selected eClaims immediately. You can now carry on
with your work - the actual process of sending the eClaims will be carried out
by Webworker in the background.
Note that a batch number will be assigned to the eClaim (or eClaims) that
you sent. This batch number is used for administrative purposes, but
should not be confused with "batch versus realtime" processing. Even
single realtime eClaims will receive a batch number.
|