Report Basics
A report is simply "a way of getting information out of Panacea". A report
is a document which can be viewed on your monitor, or can be printed onto paper.
Some reports provide a lot of detail, whereas others provide useful summaries
which can be used for managing your practice.
Panacea's reports are accessed from the Reports menu. In
general you will be required to configure some options before the report in
generated. Once the report has been generated it will be displayed on the
screen in the report viewer.
Some reports require a lot of processing and may take some time to generate.
In general you can carry on with other work as these reports will run in a
background thread
.
The report viewer has a toolbar at the top which looks like this:
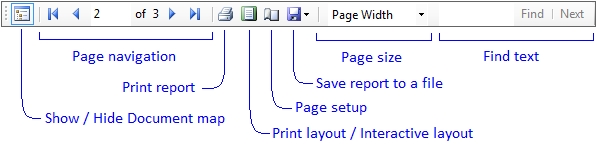
Print layout / Interactive layout
When a report is first generated it will displayed on the screen in
Interactive layout mode. In this mode you can "interact" with the
report, for example you can hide or show certain items (by clicking on
 or
or
 ) to see more or less
detail. In Interactive layout mode the pages may not look
precisely the way they will when they are printed. In Print layout
mode Panacea will show the pages exactly as they will appear when printed, but
you will not be able to "interact" with the report.
Document maps (see below) are only available in Interactive layout
mode.
) to see more or less
detail. In Interactive layout mode the pages may not look
precisely the way they will when they are printed. In Print layout
mode Panacea will show the pages exactly as they will appear when printed, but
you will not be able to "interact" with the report.
Document maps (see below) are only available in Interactive layout
mode.
|
The layout mode is changed by clicking on the button in the toolbar: |

|
Print layout |

|
Interactive layout |
Document maps
Certain reports have a Document map, which is a
treeview
representing an overview of the report. You can click on any item in the
treeview
and Panacea will take you to that item in the report.
|
Document maps are displayed or hidden by clicking on the button in the toolbar: |

|
Show Document map |

|
Hide Document map |
Page navigation
The navigation buttons allow you to move between pages in the report, as
follows: |

|
Move to the first page in the report |
|

|
Move to the previous page in the report |

|
Move to the last page in the report |
|

|
Move to the next page in the report |
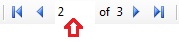 You can also go directly to the page of your choice by typing the page number
into
the page navigator (indicated by the red arrow). After entering the page
number press the Enter key on your keyboard.
You can also go directly to the page of your choice by typing the page number
into
the page navigator (indicated by the red arrow). After entering the page
number press the Enter key on your keyboard.
|
Printing the report |

|
Click this button to print the report. A dialog window will be displayed
enabling you to select the printer you want to use, as well as set various
printing preferences. |
|
Page Setup |

|
Click this button to display the Page Setup Dialog. This window allows you
to set the Page Size (e.g. A4), Paper Source,
Orientation and Margins. In general it is not
necessary to modify any of these settings. |
|
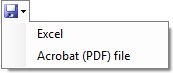
Saving a report to a file |
|
Click on this button to save the report to a file (also called "exporting" the
report). A menu will be displayed allowing you to select the format you
would like to save the report in (Excel or PDF). After you click on your
desired format Panacea will display a Save As dialog allowing you
to select a filename and location for the file. After selecting the
filename and location click Save to complete the operation.
Saving a report to a file has many potential benefits. For example, after
saving a report to a file you could email it to someone as an attachment. You could
also store important reports somewhere safe for later retrieval. |
|
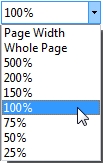
Setting the Page size |
|
Click on this combobox
to select the display size of the report on your screen. This is sometimes called
the "zoom" level. The default setting is Page Width, but
Panacea will remember your setting if you change it.
Note that this setting has no effect on the size of the report when it is
printed. |
|
Finding text in the report |

|
This allows you to search for words contained in the report. For example you may
want to search for a particular medical aid's name (see example on the left) or
a particular patient's name. Type the word you want to find in the box
then click Find. Panacea will search for the first
occurrence of the word and highlight it in the report. Click Next
if you want to search for the next occurrence of the word. |
Date Range / Period Range selector
Many reports require you to specify a start and end date or start and
end
period
. For example, the
Daily Invoice Totals
report will only include invoices that fall into the date range or period range specified
on the report's Date Range / Period Range selector.
Using this selector is very easy. Start by clicking on the By date
or By period tab to tell Panacea whether you want to work with a
date range or a period range, then specify the range. |
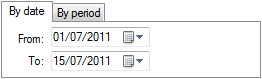
|
If you click on the By date tab then you will need to specify the date
range using the From
DatePicker
and the To
DatePicker
. |

|
If you click on the By period tab then you will need to specify
the period range using the From
ComboBox
and the To
ComboBox
. |
|