Adding a Practice
Before using Panacea you need to set up your practice details. Panacea can
actually administer multiple practices at the same time, each of which will need
to be set up first. The Add Practice Wizard will guide you
through this process.
The Add Practice Wizard can be started by selecting System -
Manage Database - Add a Practice from Panacea's menu. Also, if you
execute Panacea and it detects that you have not set up a practice yet it will
display a popup window asking if you would like to set up a practice.
Answering Yes will start the Add Practice Wizard.
When the Add Practice Wizard is started the initial window will
ask for your practice details. Here is an example after details were
entered:
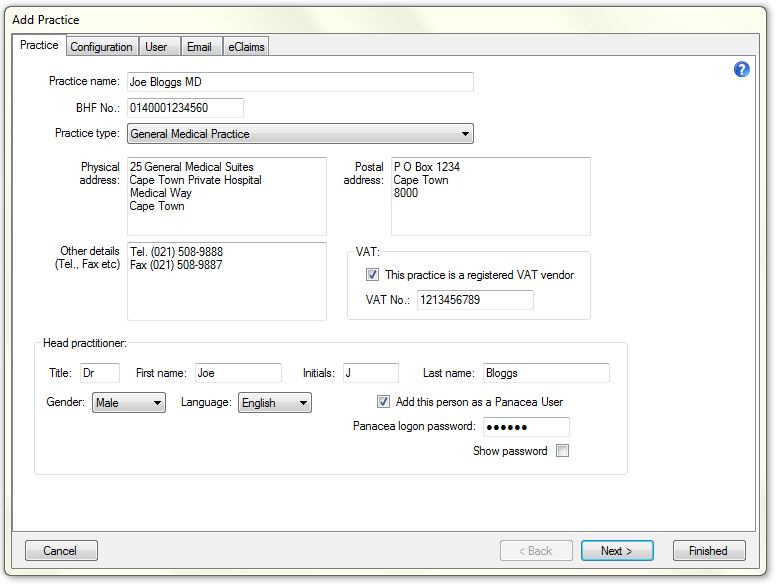
Practice tab
Practice name
This is the name that will be used by Panacea to label the practice.
It will appear in the Practice selector and on Panacea's title bar
(see
Window layout
). It will not be printed on your statements.
BHF No.
Your BHF (Board of Healthcare Funders) practice number. You must
enter your full 13 digit number. If you do not know your 13 digit number
then please find out. Do NOT attempt to convert your 7 digit number by
padding it with zeros etc. Failure to enter your correct BHF number
will result in non-payment of all your claims.
Practice type
Select your practice type from the
ComboBox
.
Physical address, Postal address and Other details
These will be printed on your statements.
VAT
If your practice is registered for VAT please check the This
practice is a registered VAT vendor
checkbox
. Enter your full VAT number in the VAT No. field.
Head practitioner
Please enter the details of the head practitioner. The Add
Practice Wizard will use the details to set up a
person
and a treating practitioner. If you check the Add this person as a
Panacea user
checkbox
then the Add Practice Wizard will also add the head practitioner
as a
Panacea user
with full access rights to the practice being added.
Once you have completed all the necessary fields on the Practice
tab, click Next to take you to the Configuration
tab.
Configuration tab
The Configuration tab allows you to choose if certain data items
are shared with other practices on your database. For example, if you
would like the practice to share the
People
or
Companies
table with a practice that already exists on your database, then click on the
relevant
ComboBox
for options.
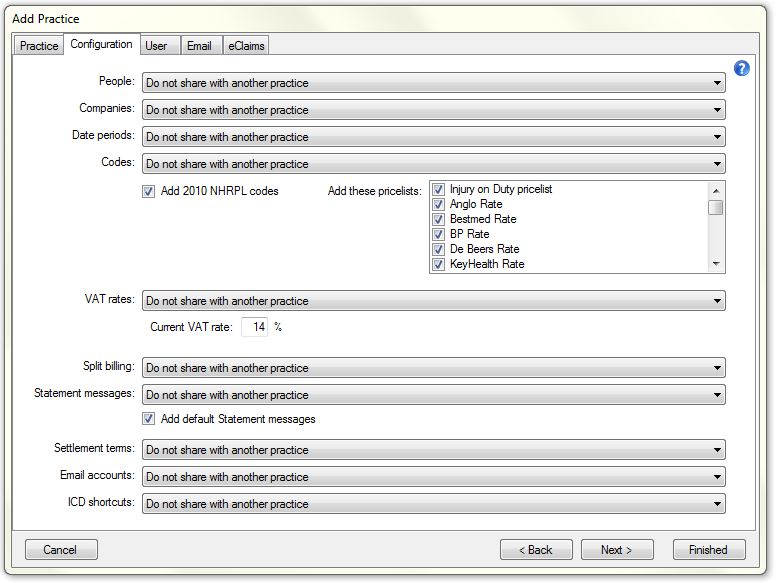
 Sharing tables
If you click on one of the
ComboBoxes
(next to a table description) you will see options to share the table with other practices at your site.
Sharing a table has the benefit that you will never have to add the same item
twice. For example, if you have two practices at your site (e.g. a physio
and a podiatrist) it is possible that a patient would make use of the services
of both practices. If both practices are sharing the same
People
table then you will not need to add that person twice. Your choice on whether to
share each table depends on your particular circumstances. However, keep
in mind that all
accounts
and billing information are always kept separate so, in general, it is safe to
share tables.
Note that if you do not share certain tables you may need to set them up.
For example, if you do not share your Codes table you may need the
wizard to add the NHRPL codes to your table. |
Add 2010 NHRPL codes
If you choose not to share your Codes table with another practice you are
given the option to add the 2010 NHRPL codes (the NHRPL was not
published in 2011). Make sure the Add 2010 NHRPL codes
checkbox
is checked, otherwise you will need to add all your codes manually.
Add these pricelists
Check the pricelists that you want the wizard to add to your practice.
It is recommended that you check all pricelists so that they are all added.
At a later stage you will need to configure your practice's billing policy and
this may require the pricelists to be present.
Current VAT rate
If you choose not to share your VAT rates table with
another practice you will need to enter the current VAT rate into this field.
Add default Statement messages
If you choose not to share your Statement messages table
with another practice then checking this
checkbox
will tell the wizard to add default Statement messages for you. You will
be able to modify these to suite your own needs at a later stage.
Once you have completed all the necessary fields on the Configuration
tab, click Next to take you to the User
tab.
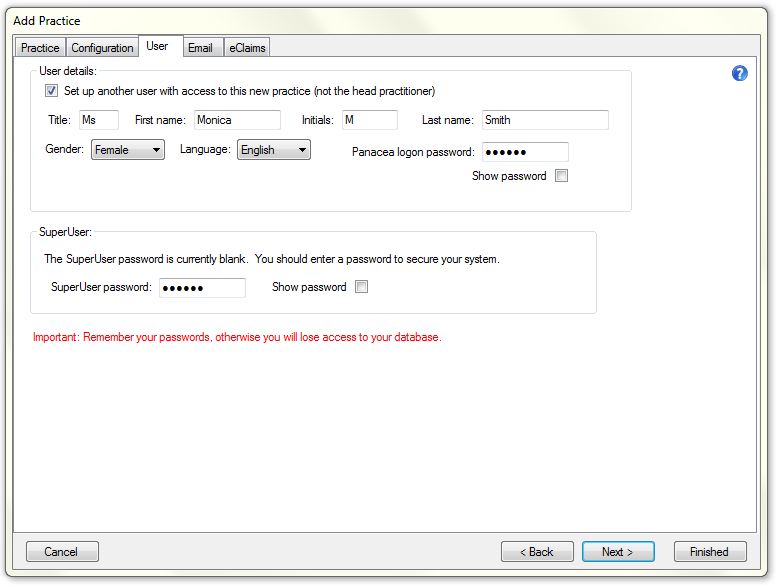
User tab
The User tab allows you to add another
user
with access to the
practice you are adding. If you have a secretary that will be using
Panacea you should add him/her here. The User tab will also
allow you to configure your
SuperUser
password if it has not already been set.
Once you have completed all the necessary fields on the User
tab, click Next to take you to the Email
tab.
Email tab
The Email tab allows you to set up your email account details.
Below is an example of a Gmail (Google mail) account.
Click
here
for an example of a Yahoo mail account.
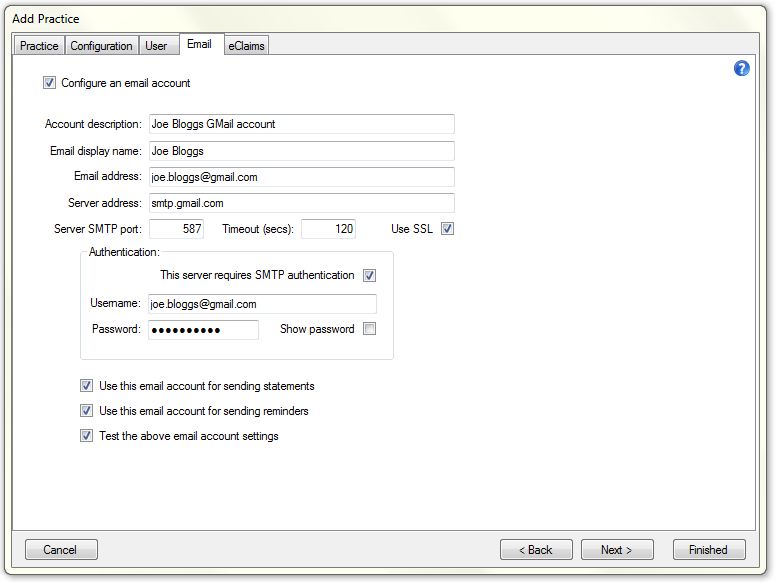
Configure an email account
Check this
checkbox
if you would like to configure an email account to use with the new practice.
Email accounts are used to send statements and appointment reminders. You
will need to obtain all the settings from your Internet Service Provider (ISP).
You can leave the
Configure an email account
checkbox
unchecked if you don't want to configure these settings now.
Account description
This is the description that will be used
by you when working with Panacea. If you intend to use more than one email
account then make sure the descriptions distinguish between them.
Email display name
This is the name that will appear in the
email's From field (when viewed by the recipient). You can
put your personal name here (e.g. "Joe Bloggs") or the name of your practice
(e.g. "Joe Bloggs GP"). You could even put something like "Joe Bloggs
Accounts Department".
Email address
Enter your email address here. If a
client replies to one of your emails the reply will be sent to the address you
enter in this field.
Server address
This is the IP address or host address of your
ISP's SMTP server.
Server SMTP port
This is usually 25, but is
sometimes 587. A different value might be specified by your
ISP though.
Timeout (secs)
This specifies the amount of time
Webworker
must wait when attempting to send an email. 120 is
recommended.
Use SSL
This indicates if your ISP requires SSL to encrypt
the connection.
This server requires SMTP authentication
This
checkbox
determines whether
Webworker
should authenticate when attempting to send emails. If you check this
checkbox
then you must provide the Username and Password.
Username
This is the SMTP logon username provided by your
ISP. It is usually your full email address.
Password
The SMTP logon password provided by your ISP.
Use this email account for sending statements
Check this
checkbox
to configure your practice to use this email account for sending statements.
Use this email account for sending statements
Check this
checkbox
to configure your practice to use this email account for sending appointment
reminders.
Test the above email account settings
Check this
checkbox
to test the email account settings after the wizard completes.
Testing works as follows:
- A test email is sent by
Webworker
to Datamax. A
message
will be sent to you indicating if this was successful or if there was a problem.
- If the email was sent successfully in step 1 Datamax will respond to the test
email. Datamax's response email will be received by you in your normal
email application (e.g. Outlook, Outlook Express or
Windows Live Mail). Ensure that you receive this
confirmation before using Panacea's email features.
Once you have completed all the necessary fields on the Email
tab, click Next to take you to the eClaims
tab.
eClaims tab
All practices on Panacea must be configured for eClaims - even if you do not
wish to use eClaims. However, you do not have to do this immediately.
Each Panacea site will have a Network User ID, Password
and Site mailbox. These are shared by all practices at the
site and are used by Webworker to log on and transact with Datamax's servers.
Each practice at the site will have a Practice mailbox, which is
unique to that practice. Below is an example of typical eClaims settings:
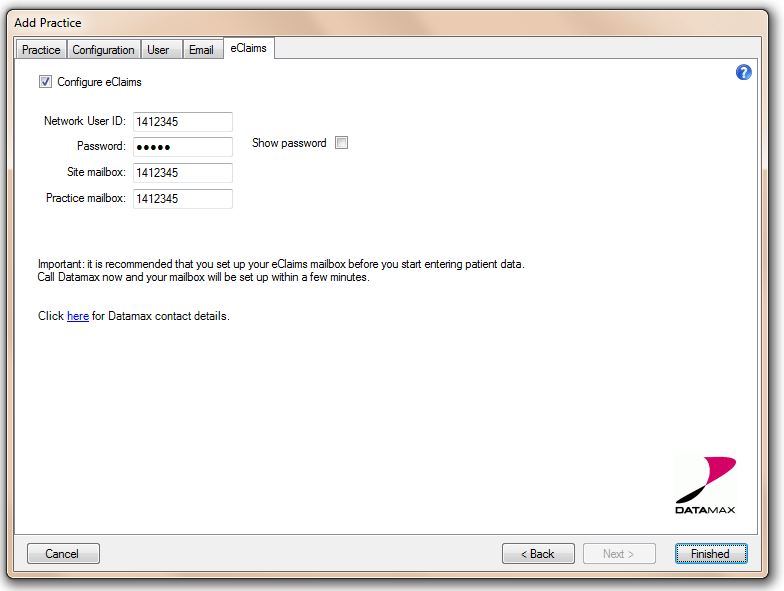
The settings on the eClaims tab should be entered in co-operation
with Datamax client services. Contact details for Datamax client services
are provided on the eClaims tab (see Click here for Datamax contact
details).
If you left the Configure eClaims
checkbox
unchecked you will be able to configure them at a later stage by selecting
System - Practice Settings - eClaims on Panacea's menu.
Finished
When you are satisfied that you have supplied all the correct details on all
tabs of the Add Practice Wizard click Finished.
Panacea will add the new practice and will configure it according to all the
options and settings that you selected.
Before capturing any invoices you need to decide on a billing policy.
Click
here
for a discussion on this.
|